
©Pat Ashforth & Steve Plummer 2021
©Pat Ashforth & Steve Plummer 2021


EYE OF THE TIGER : PART 2
Illusion Knit Tutorial Part 2: Importing and sizing the image
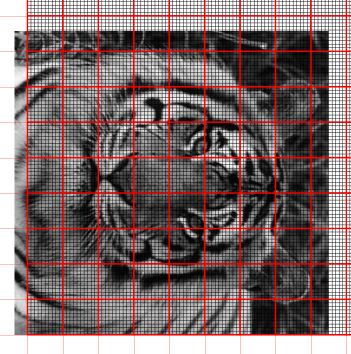
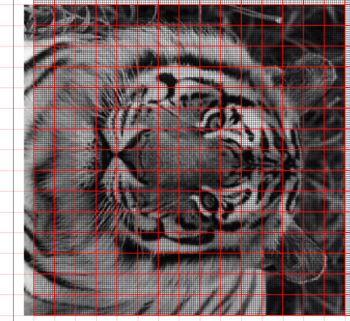
Open your drawing program with the layers and grids. Import the rotated tiger’s head image to the bottom layer. The image is unlikely to be the correct size for your grid (as shown on the left) and will need to be resized.

I want to place the image on my grid in such a way that it is 150 small black squares (15 large red squares) high and the right hand end of the image is on the line at the end of the 15th large red square.
I want to do this while still retaining the proportions of the original image. Your drawing program will have some way of keeping these proportions, maybe dragging from one of its corner marks, or holding down the shift or control key while dragging a corner.
When the image is at the right size and in the right position there will still be a small amount of the image falling off the grid on the left hand side. This does not matter, I’m going to ignore this bit of the image. The important thing is that you will now have an image that is the same size and in the same position, in relation to your grid, as the one I am using.

| The Gift of Life |
| Merry Christmas |
| Drawing Programs |
| Using Inkscape |
| Modelling Programs |
| George Maffett's Introduction |
| Art tutorials |
| Geometric tutorials |
| Video tutorials |
| Maple Leaf |
| Tiger |
| Maple Leaf : Part 1 |
| Maple Leaf : Part 2 |
| Maple Leaf : Part 3 |
| Tiger : Part 1 |
| Tiger : Part 2 |
| Tiger : Part 3 |
| Tiger : Part 4 |
| Tiger : Part 5 |
| Tiger : Part 6 |
| Tiger : Part 7 |