

©Pat Ashforth & Steve Plummer 2021
©Pat Ashforth & Steve Plummer 2021

INTRODUCTION TO ILLUSION KNITTING
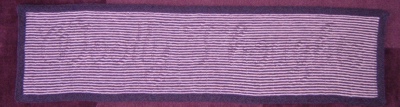
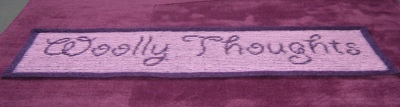
Illusion Knitting is also known as Shadow Knitting. When you look straight on to a piece of illusion knitting you see only stripes. A picture or pattern can be seen when you look from a different angle.
See Illusion Art and Illusion Artefacts for photos of completed pieces.
It is a simple technique, based on stripes in two colours, using knit and purl stitches to create special effects. It relies on careful counting and positioning of stitches. It is suitable for knitters of all abilities. You will find many descriptions of how to do illusion knitting and how to chart the designs. We believe that our charts are different from any others and are easier to follow, even when making a complex-
* * * * * * * * *
In illusion knitting each stripe is made up of two rows. The right side of every stripe is knit, whichever colour is being used. You can completely forget about the right side rows as they are always plain knit.
All the action takes place on the second row of the stripe (which is the wrong side of the work). You only need a chart for the wrong side rows. On the chart, white stitches are purl, coloured stitches are knit, using the colour for the stripe you are working.
* * * * * * * * *
Illusion knitting stripes are closer to garter stitch than they are to stocking stitch. Garter stitch ridges and stitches form a square grid and, in our experience, a design on a square grid works much better for illusion knitting than a normal stocking stitch (intarsia) grid. Designs intended for cross-
* * * * * * * * *
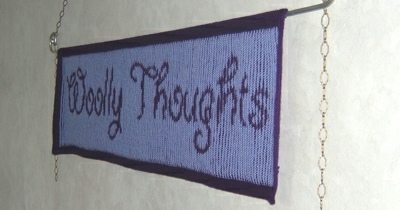
Illusions can be designed to be viewed from the side or from the bottom. The basic technique is the same but you need to consider your viewing point before you start designing.
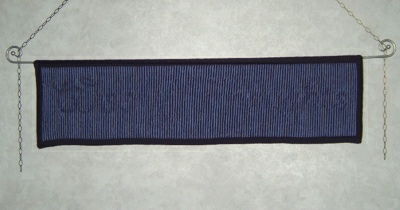
The photos below show two banners, using the basic illusion knitting methods. One reveals the illusion when looked at from below; the other should be viewed from the side.

| The Gift of Life |
| Merry Christmas |
| Drawing Programs |
| Using Inkscape |
| Modelling Programs |
| George Maffett's Introduction |
| Art tutorials |
| Geometric tutorials |
| Video tutorials |
| Maple Leaf |
| Tiger |
| Maple Leaf : Part 1 |
| Maple Leaf : Part 2 |
| Maple Leaf : Part 3 |
| Tiger : Part 1 |
| Tiger : Part 2 |
| Tiger : Part 3 |
| Tiger : Part 4 |
| Tiger : Part 5 |
| Tiger : Part 6 |
| Tiger : Part 7 |