

©Pat Ashforth & Steve Plummer 2021
©Pat Ashforth & Steve Plummer 2021

CHARTING BASICS
For those who are new to illusion knitting, this is an explanation of the basics and a very simple worked example.
Illusion knitting is created in ridges, each ridge being just one colour of yarn. Illusion knits are usually created with two contrasting colours of yarn but can sometimes be found with just one colour. When viewed from directly in front only these alternating ridges of colour will be seen but when viewed from the appropriate angle an image will be visible.
In illusion knitting every right side row is knit stitches. On the wrong side row the stitch will be either knit or purl. Purl stitches on the wrong side row will create a slight dip in the work when viewed from the front, knit stitches will not have this effect. It is this difference between knit and purl stitches that is used to create the effects we see in illusion knitting.
Pieces of illusion knitting are either designed to be viewed from the side or from below. When the completed illusion is viewed from the appropriate place any dips created by purled stitches on the wrong side rows will allow the knitted stitches in the ridge beyond them to stand out and be seen.
The general idea in creating illusion knitting designs is to decide which stitches you want to see, knitting those stitches on the wrong side of the work and purling the stitches in the ridge immediately before them on the wrong side of the work.
With this type of knitting an equal number of stitches and ridges knitted will be very close to being square (unless you are working with a very large piece). This means that if the squared chart shows ridges of knitting instead of rows of knitting there will be no distortion of the original image.
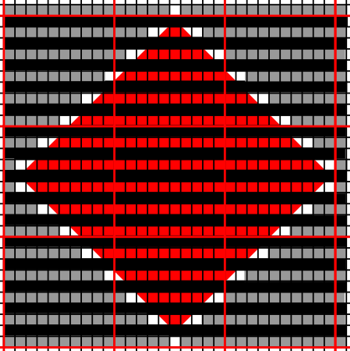
How I create an illusion of a square standing on its corner.

Using a computer drawing program, I put a grid over the image.
I need to scale the image so I can get enough detail into it.
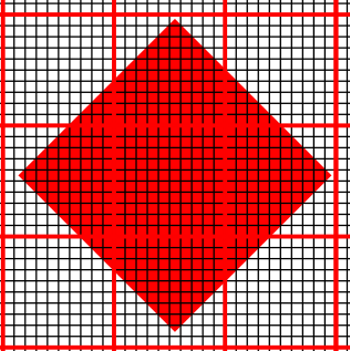
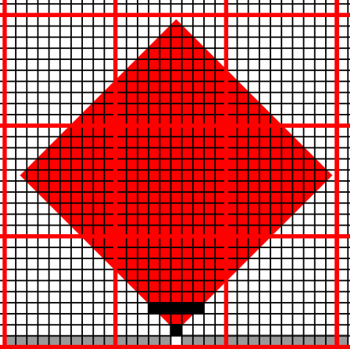
Remember, each square on the grid is a stitch. If you do not have a computer drawing program that will allow you to do this then Inkscape is free to download and relatively easy to use. See Using Inkscape page.
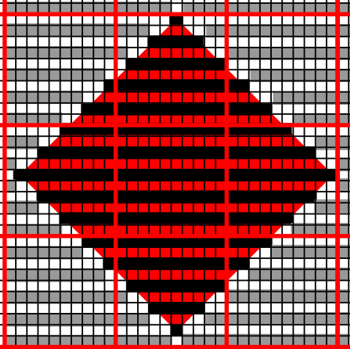
I am going to use two colours to knit my illusion. These will be contrasting colours. The dark grey that I use to colour in squares represents one of these colours and the light grey represents the other colour. These colours will show the stitches that are knitted on the wrong side row (remember that all stitches on the right side rows will be knit stitches). Stitches that need to be purled on the wrong side row will have their squares on the grid left white.
Starting at the bottom corner of the red square. I want to see the corner stitch, so I colour this in with a dark grey rectangle.
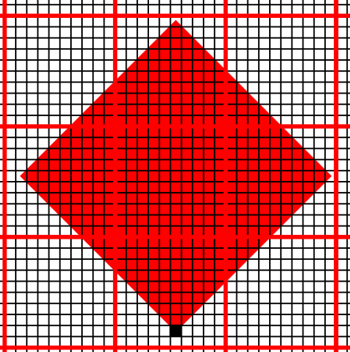
This will be a knitted stitch in my dark colour. The stitches to either side of this stitch need to be hidden, they need to be purl stitches, so I leave them white.
The stitch directly below this dark stitch needs to be purled (to be able to see the dark stitch behind), so I leave that square on the grid white. The stitches to either side of that purled stitch need to be knitted so I colour them in with light grey.
Completing the colouring of the rest of the grid gives this.
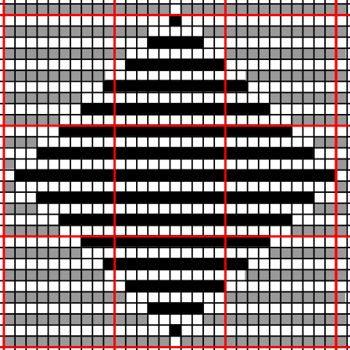
When the illusion knit is completed the centre square will seem to be one of my two colours of yarn and the surround will seem to be the other colour of yarn.
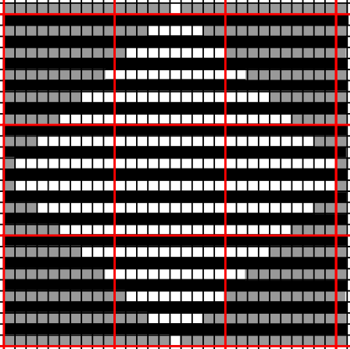
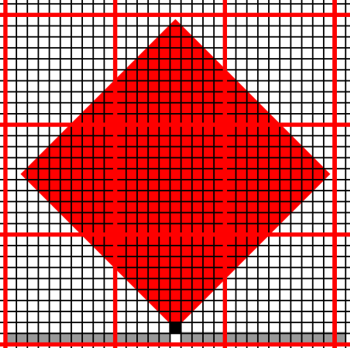
You could stop at this point, miss out the final two diagrams and go straight to the instructions at the bottom of the page. BUT….
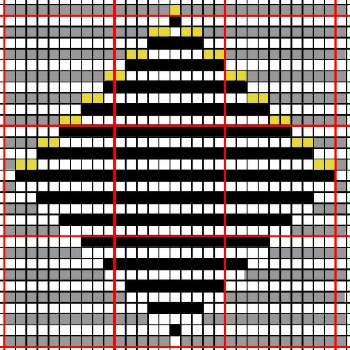
The following change in the colouring of the grid will make the centre square in the completed illusion seem to be one of my two colours and the surround will seem to be a mixture of my two colours.
Ridge 1.
Cast on 31 stitches in your lighter colour of yarn. This is your first right side row.
On the wrong side row, still in the lighter colour, follow the chart from left to right knitting all coloured squares and purling all white squares. (If there are any.)
Ridge 2.
Using your darker yarn, knit the right side row. For the wrong side row, still in the darker colour, follow the chart from left to right knitting all coloured squares and purling all white squares. (If there are any.)
Continue in this way over the whole chart remembering that the colours alternate ridge by ridge. (Each ridge is only ever one colour.)
Continue in this way with dark colours and light colours, deciding on the stitches you need to see (knit stitches) and the stitches you need to hide (purl stitches)
Before I print out the grid, or try to view it to do my knitting of the illusion, I hide the layer showing the original image.
January 2014 -
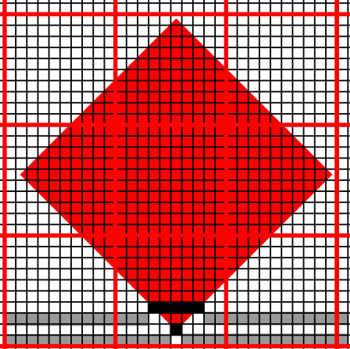
As a result of our experience, we have refined our methods, over time, to be more consistent.
The changes are shown here in yellow.
The difference in the result is very subtle so is really a matter of personal preference.
| The Gift of Life |
| Merry Christmas |
| Drawing Programs |
| Using Inkscape |
| Modelling Programs |
| George Maffett's Introduction |
| Art tutorials |
| Geometric tutorials |
| Video tutorials |
| Maple Leaf |
| Tiger |
| Maple Leaf : Part 1 |
| Maple Leaf : Part 2 |
| Maple Leaf : Part 3 |
| Tiger : Part 1 |
| Tiger : Part 2 |
| Tiger : Part 3 |
| Tiger : Part 4 |
| Tiger : Part 5 |
| Tiger : Part 6 |
| Tiger : Part 7 |