

©Pat Ashforth & Steve Plummer 2021
©Pat Ashforth & Steve Plummer 2021
KNITTING BASICS
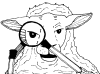
Illusion Knitting is also known as Shadow Knitting.
All Illusion Knits are created in the same basic way although there are varying degrees of complexity. The most complicated-
Yarns
The only essential characteristic of the yarns you choose for illusion knitting is that they should be smooth. Any lumps, bumps or fluffy bits will stop you seeing the design clearly. The type of yarn you choose will depend on what your are making. Most of our illusions are worked in Stylecraft Special DK, which is an inexpensive acrylic yarn, which comes in a very wide range of colours.
If you are making a wall-
The yarn can be of any thickness. A thicker yarn will create a bigger picture than a thinner yarn worked from the same chart.
Most illusions use two colours of yarn. It is important that the yarns should be of the same thickness, so it is probably best to use two from the same range. Even within a particular range thicknesses can vary slightly, due to the dyes used, but you will never get a closer match. If one yarn is noticeably thicker than the other, it will dominate, and the illusion will be less clear.
Whatever yarn you choose the finished illusion should be handled with care to avoid flattening it. Never iron or steam your illusion as the effect will be lost.
Colours
Our instructions refer to light and dark for the two colours used. We use the same terminology throughout although the two colours may not fall into the usual way of thinking of light and dark. The two yarns must have enough contrast to be able to see each clearly. You can use two very deep colours provided they contrast, and maybe even clash, with each other. It is more difficult to use two pale colours as they may tend to merge together from a distance.
To test whether colours will be suitable, place the two yarns together and look at them with your eyes half closed. If you can see two distinct colours the combination should work.
Needles
Work on needles slightly smaller than you would normally use for your chosen yarn. Tight work will show off the illusion to best effect. If you are making a big piece, you may want to work back and forth on a circular needle. You will then be able to spread the work out flat, from time to time, to check on your progress.
Markers
The squares on the charts are marked in groups of ten, by red lines. It is helpful to have markers on your knitting to correspond with the positions of the lines. You do not need special stitch markers. Use safety pins, paper clips, elastic bands, loops of yarn, or anything else that can be placed between the stitches and slipped from one needle to the other.
You may also want to mark which row you have got to. There are many ways to do this. The simplest is probably to cross out each row as you finish it. A magnetic strip can hold your paper to a metal board.
Some people like to work directly from the chart on the computer screen. If you do this you can draw your own horizontal ruler and move it up the screen as you work.
September 2013 -
How to see the illusion
When you look straight at a piece of illusion knitting you will see nothing but stripes. As you move away and look from a different angle you will start to see a picture appear. The clarity of the picture will depend on the effects of the light as you look at it. You might expect the images to be at their best in strong light but this is not always the case.
How illusions work
Illusion knits work because the arrangement of knit and purl stitches allows you to see some stitches and not others when you look from an angle.
How the effect is created
The design consists of alternating ridges in two colours. We refer to ridges throughout. A ridge is made up of two rows. It may be a garter stitch ridge, a stocking stitch ridge, or some mixture of the two.
Garter stitch ridges stick up; stocking stitch ridges are much flatter. When you look straight at the knitting you can see them all but when you look across the surface the garter ridges stick up and the stocking stitch ridges hide.
Our charts and terminology are different from those you will find elsewhere. They are much easier as you can see the picture you are trying to create. You need to forget the usual way of knitting and concentrate on two rows forming a single stripe, which we call a ridge.
Types of illusion
Our illusions fall into two broad categories:
Shape, texture and colour effects
Pictures and other artistic effects
Note about swatches
Many of the samples are shown as squares. This is to make it easier to compare what you see from different directions. In most cases you do not have to knit squares.
Many are also shown with a border of some sort. Again, this is not essential. It is merely there for the sake of the photograph so that you are not looking directly at raw edges.
| The Gift of Life |
| Merry Christmas |
| Drawing Programs |
| Using Inkscape |
| Modelling Programs |
| George Maffett's Introduction |
| Art tutorials |
| Geometric tutorials |
| Video tutorials |
| Maple Leaf |
| Tiger |
| Maple Leaf : Part 1 |
| Maple Leaf : Part 2 |
| Maple Leaf : Part 3 |
| Tiger : Part 1 |
| Tiger : Part 2 |
| Tiger : Part 3 |
| Tiger : Part 4 |
| Tiger : Part 5 |
| Tiger : Part 6 |
| Tiger : Part 7 |